What is Rancher ?
We are in cloud age right now, and there are several company provides cloud solutions. Beside this, containerisation technologies are now very simple to use Docker, but for production ready systems we need to use orchestration systems. Both cloud systems and orchestration systems has standards for all providers, you need to be specialised for every cloud provider, and orchestration tools. You can see some of cloud providers here, and Mesos, Kubernetes, Swarm, Cattle are some of orchestration tools that you can use. Rancher provides us a clean interface to manage container system in a cloud agnostic way by isolating cloud providers and orchestration tools.
How ?
We have 2 options to run Rancher on our system.
RancherOS
RancherOS is a minimal operating system built by Rancher Labs to provide production ready system to execute rancher related services.
Rancher Server
On this option, we can simply run docker container located here on modern Linux distribution with a supported Docker. RancherOS, Ubuntu, RHEL / Centos 7 are the mostly tested ones
We will continue with RancherOS during this tutorial.
Requirements
We will create a virtual machine by using prebuilt RancherOS, so only Docker Machine needed. I assume you all have Docker Machine installed.
Go!
In order to use rancher goodies, we need to have a proper environment. Let’s create a machine with a pre-built rancher image.
docker-machine create -d virtualbox — virtualbox-boot2docker-url https://releases.rancher.com/os/latest/rancheros.iso kloia

After machine creation, you can ssh into machine by following command;
docker-machine ssh kloia
At first stage, we have no running container;

We have ready environment to start rancher server with following command;
sudo docker run -d --restart=unless-stopped -p 8080:8080 rancher/server
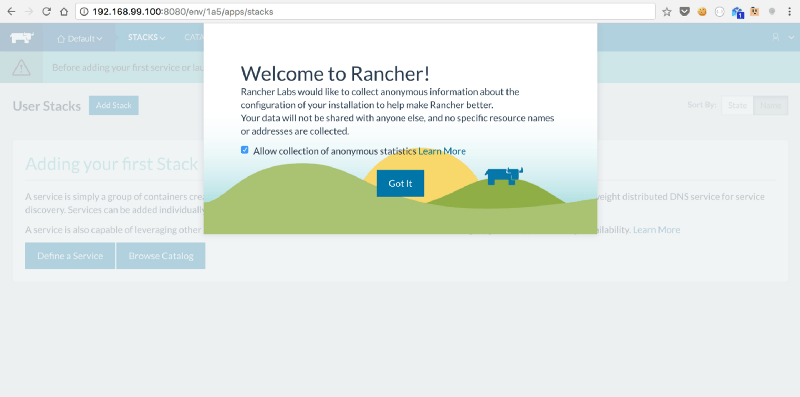
Now we have Rancher containers on our system.

As you may realised, we have exposed port 8080. This port is for Rancher UI like below.
In order to access ui, you can get ip address with following command.
docker-machine ip <machine_name>
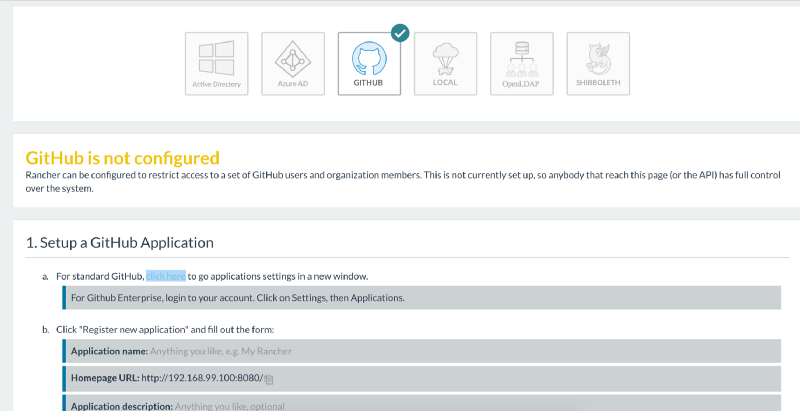
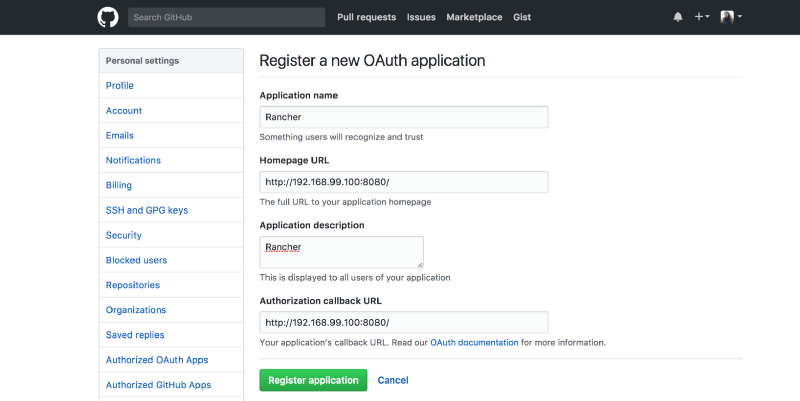
Most probably, the first thing you want to do is adding authentication / authorisation system to your Rancher UI. On main menu, you will see a warning indicator on Admin menu. In this tutorial, we will continue with Github login. For Github login, you will need a Github application. To create an application, please follow instruction on that screen.

Now we are able to login Rancher UI with our Github account.
We have installed the brain of Rancher and this will lead all the system we will configure later.
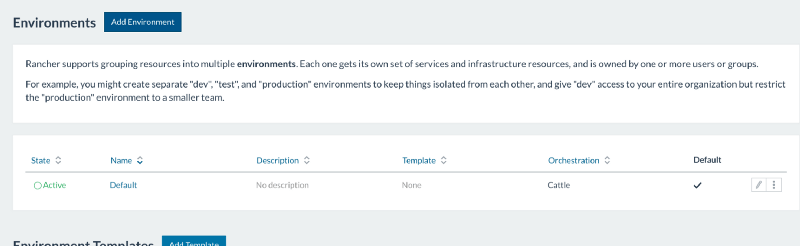
Rancher Environment
Rancher comes with a Default environment once you installed to your system. This environment uses Cattle for orchestration. We will create another environment to create all the things from scratch. Go to Manage Environment > Add Environmnet
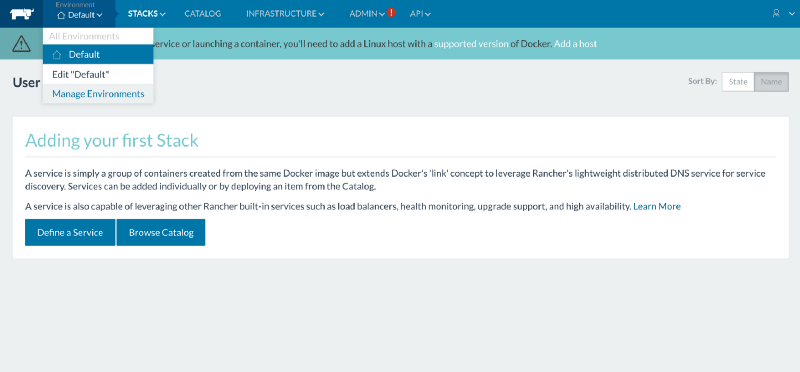
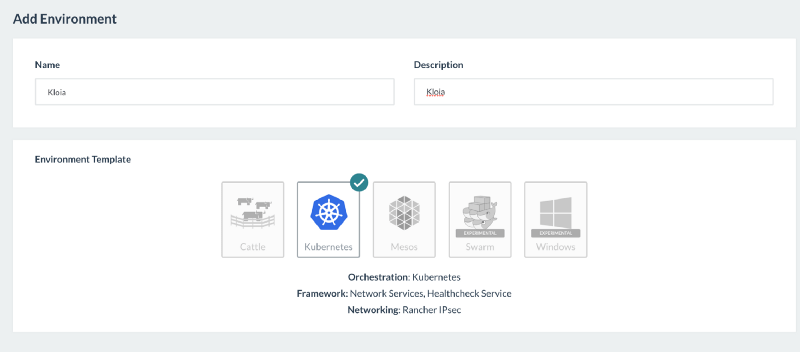
While you are adding your environment, you will be able to select your orchestration tool, we will continue with Kubernetes.
Since, we have no cluster host yet, you will see following on newly created environment;

Add Hosts for Cluster
In order to run your containers, services, and stacks on Rancher, you need to enrich your cluster to have stable environment. In order to do that, you need to run some pre-configured script that you can grab on Rancher UI on your host that you have setup before. We will create another machine for rancher host with following command;
docker-machine create -d virtualbox rancher-host-1
We have already created an environment on previous stem and when you go to that environment, you will see a message on header that warns you to Add Host. Click that link and select Custom. Get the ip address of your rancher host with following;
docker-machine ip rancher-host-1
This will give you some thing like 192.168.99.101. On Add Host UI, once you add IP address of your host, it will generate an agent script that you can run on your cluster host. That will be something like below;
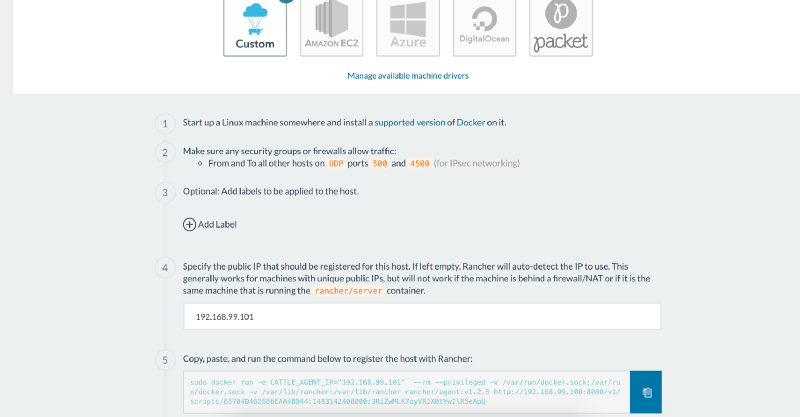
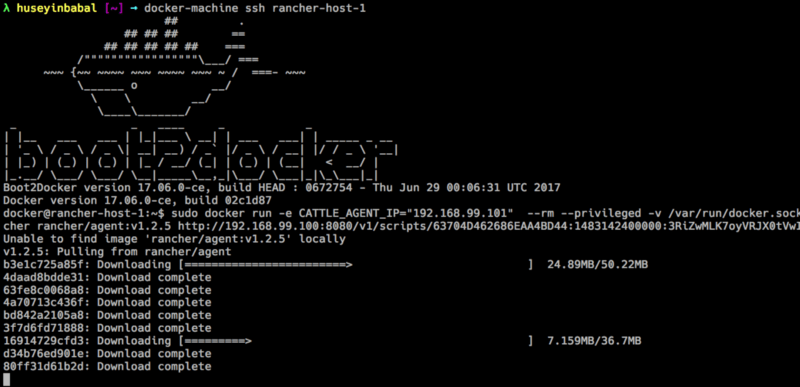
Copy the generated docker run command and execute it on your cluster host. You can ssh into machine via following;
docker-machine ssh rancher-host-1
After successful operation, you will se your host on Rancher UI
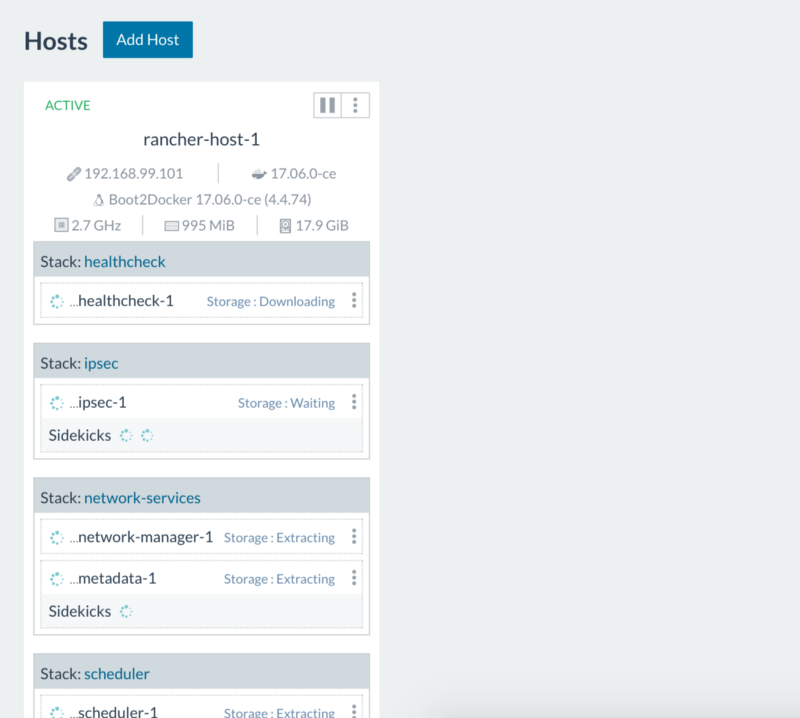
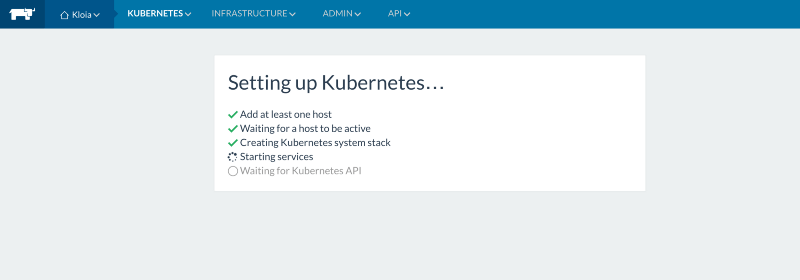
Validate Kubernetes
If you managed to add host successfully, you will see Kubernetes processes finished successfully on Environment page;
Conclusion
In this tutorial we have focused on complete installation of Rancher to have stable and scalable manageable containerised environment. We will mention about running stacks, services, containers on upcoming Rancher tutorials.
